

How To Change The Blade On A Silhouette Cameo
Quick Links

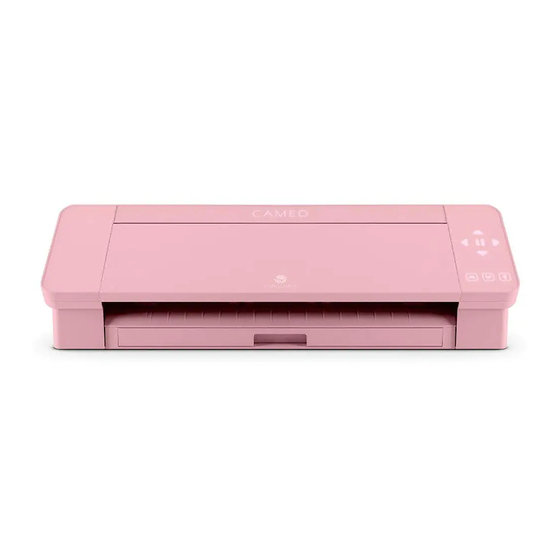
Related Manuals for Silhouette CAMEO 4
Summary of Contents for Silhouette CAMEO 4
- Page 1 User Manual...
-
Page ii: Tabular array Of Contents
Show Library Split Screen ....................................15 Silhouette Design Store ......................... 16 Download Designs ......................................17 Transport Panel ..............................18 Set up the Cameo 4 ..........................19 Place Material on the Cutting Mat ................................19 Turn On the Cameo......................................19 Load the Tool ........................................twenty Adjust the Rollers .......................................22... -
Page 3: What'southward In The Box
What'southward in the Box? The Silhouette Cameo® comes with the items shown in the following list. Check that all the items have been included earlier you proceed to apply the machine. If yous are missing any items listed beneath, please contact support@silhouetteamerica.com. -
Folio 4: Remove Packaging From The Machine
There are strips of record, cardboard, and cream to hold the moving parts of the Cameo in identify during shipment to foreclose any impairment to the auto. Have the Silhouette Cameo® from the box and remove the strips of tape that are belongings the chapeau and any machine pieces in place. -
Page 5: Annals Your Automobile
The kickoff affair to do is create a Silhouette account, if necessary, and register your auto. Completing this footstep is what will let you to access your 100 free designs in your Silhouette Library. -
Page 6: Download And Install Silhouette Studio
(Mac or Windows) and follow the prompts on your computer to finish the installation. The software is necessary to run your Cameo 4 cutting machine, and then don't forget this step! You'll learn more most how to use the Silhouette Studio® software later in the manual. For now, end the motorcar setup process. -
Folio seven: Claim Your Gratuitous 1-Month Basic Subscription
The subscription you'll be starting out with is the Basic tier, which means you become $25 of credits for the month. To claim your free 1-month subscription, beginning by going to the Silhouette Pattern Store. Yous can do this by opening a web browser and going to SilhouetteDesignStore.com... -
Page 8: Admission The 100 Gratuitous Designs In Your Library
Admission the 100 Complimentary Designs in Your Library After you annals your Cameo 4, you will be able to access the 100 gratis sectional designs that come with your motorcar. To view your free designs, get to the Library tab in Silhouette Studio®. The software will prompt y'all to sign in to your Silhouette account if you oasis't already done so. -
Page 9: Navigate Silhouette Studio
Now that you've downloaded Silhouette Studio®, information technology's time to learn how to use it. To open Silhouette Studio®, locate the Silhouette Studio® icon on the desktop or in the Start Carte du jour on your PC or in the Applications folder on your Mac. Double-click the icon to run the application. -
Page x: Navigation Tabs
Designs can be stored on your estimator or on the Silhouette Cloud. Send The Send tab allows yous to adjust the cutting settings for your designs and send them to your Silhouette. This bill of fare works similar to a Send to Print menu in other programs. -
Page eleven: Design Area
Silhouette Cameo® four User Manual Design Surface area The Design area is the showtime area you'll see when yous open Silhouette Studio®, and it is the area yous'll likely spend most of the time in, so it'southward of import to learn how to employ information technology to create your designs. -
Folio 12: Drawing Tools
Cartoon Tools Freehand Tools Text Tool Describe a Note Notation: If you lot take other editions of Silhouette Studio® (eastward.g. Silhouette Studio® Designer Edition), Eraser Tool you may see more drawing tools than you see listed here. You can learn more than about those tools in the Knife Tool Silhouette Studio®... -
Page 13: Text
Silhouette Cameo® 4 User Transmission Text To cut messages or words using whatsoever font on your computer, choose the Text tool from the toolbar on the left-hand side of the screen. With the Text tool selected, click anywhere on the folio and brainstorm typing. The font volition be a default font, but you can easily modify this in the Text Style console that pops up. -
Folio xiv: Library
Silhouette Library. When y'all click on the Library tab, y'all may be asked to sign in to your Silhouette account if y'all oasis't already washed and then. Input your email address and password, and click "Sign In." If you don't already accept a Silhouette account, you can click the "Sign upward Costless"... -
Page 15: Organize Your Library
When y'all purchase designs from the Silhouette Pattern Store, those designs volition prove up in your Recent Downloads. From in that location, you lot can motion the designs to different folders. -
Folio 16: Search Library For Designs
Search Library for Designs Designs that you lot purchase from the Silhouette Design Store accept certain keywords associated with them, and this makes searching for a specific design unproblematic. If you desire to search for a design, open your library by clicking on the Library tab. -
Page 17: Show Library Split up Screen
Show Library Split Screen To view your designs space and your Silhouette Library at the same fourth dimension, you can employ the Library Carve up Screen feature. To split the screen, you lot must go to the Design screen. Get to the lesser left of the screen and click the folder with the down-pointing pointer (otherwise known as the Library icon) or click the triangle pointing to the right. -
Page xviii: Silhouette Design Shop
Blueprint Store regularly, and by and large there is a gratis design posted every calendar week. To access the Silhouette Pattern Store, click the Shop tab in the upper-right corner of the software. This will open up a browser window and navigate you to the shop. -
Folio 19: Download Designs
Store will ask you to sign in before downloading your design. Y'all should have already created a Silhouette account, but if you lot haven't, creating a new account only takes a few seconds. Click the "Sign up FREE" link on the login folio to create a new account. -
Page 20: Transport Panel
For more than advanced settings, you can use the Line panel, the Fill up panel, or the Layer panel. With the Line Panel or the Fill panel, you can assign which job the Silhouette volition do co-ordinate to the image's line colour or fill color. If you have a... -
Page 21: Gear up The Cameo 4
Position your paper or other media on the cutting mat according to the analogy in Silhouette Studio®. Turn On the Cameo Plough the Silhouette Cameo® on by pressing the power button and waiting for the machine to start up. To feed the cutting mat into the machine Lift the lid and slide information technology back. -
Page 22: Load The Tool
Load the Tool Choosing a tool or blade is an of import pace in preparing your Silhouette to cut. Since your machine comes with an AutoBlade, you can insert that. Unlike styles of blades are adjusted past different methods. Instructions for adjusting alternate blade types volition be included on the bract packaging. - Page 23 Send console. This feature is available just with the Cameo 4 and the Cameo four tools. You can run across a petty metal strip on the back of the tools and the tool adapters. This is what tells the machine—and in plough, the software—what tool is inserted into the tool holder.
-
Page 24: Adjust The Rollers
Silhouette Cameo® four User Manual Arrange the Rollers By adjusting the rollers on the main roller shaft, the Silhouette Cameo® tin cutting the post-obit media sizes: A4, letter of the alphabet, 12 inches, and 13 inches. White Rollers Lever Locate the release lever on the right side and turn it clockwise. -
Page 25: Utilise The Roll Feeder
Silhouette Cameo® 4 User Manual Use the Roll Feeder The congenital-in roll feeder is located inside a tray at the front of the Cameo iv. To open the roll feeder, gently slide out that tray completely. Note: When opened all the way, the roll feeder tray sticks out about 8 inches from the machine. If y'all discover that the tray is sticking out about only four or 5 inches, the tray may be caught and may not be sliding out all the mode. -
Page 26: Use The Crosscutter
Crosscutter Make sure to set things upwards in Silhouette Studio® so that your cut will feed through the Cameo properly. First, fix your cutting mat to "None" in the Page Setup panel. Adjacent when you go to the Ship tab earlier you send your blueprint, click the gear icon in the lesser right corner to open up the advanced settings. -
Folio 27: Supplant The Crosscutter Cartridge
Silhouette Cameo® four User Manual Supercede the Crosscutter Cartridge If your crosscutter blade becomes deadening and you need to supervene upon it, you tin do that easily by removing and replacing the crosscutter cartridge. To remove the crosscutter cartridge, press down on the top of the two end levers simultaneously. While doing that, pull the crosscutter cartridge out. -
Folio 28: Cutting A Design
Next select the tool or make sure the correct tool is selected. With Auto Tool Detection, your automobile should automatically detect which tool is in the tool holder. Here nosotros've put two unlike tools in the Cameo 4—the AutoBlade and the Sketch Pen tool adapter. -
Folio 29: Bluetooth® Connectivity
Bluetooth® button on your Cameo. The backlight will turn from white to blueish, indicating that information technology is turned on. In Silhouette Studio®, get to the Send tab. Click on the Bluetooth® icon at the lesser of the panel and select "Add Bluetooth® machine." After a few seconds, the condition of the Cameo will display as Prepare in the Send console, and the setup is complete.
Source: https://www.manualslib.com/manual/1647717/Silhouette-Cameo-4.html
Posted by: francisstims1950.blogspot.com
0 Response to "How To Change The Blade On A Silhouette Cameo"
Post a Comment